You are absolutely not required or expected to take part in Post Production – our staff will handle everything. But – if you’d prefer to be involved to insure your vision of the workshop is reached- then we welcome your input!
If you would like to be involved – understand that this process can be tedious and time consuming and our biggest goal is to be efficient with your time. In a best case scenario – you’ll only need to look through this material once, give your notes – and then possibly give a last look at the final workshop before it’s launched. But for this to happen – we have to make sure everything gets done on that first run through.
For this reason, it’s vital for you to look through this information carefully and ask questions before you begin It is much better to spend a little time making sure we’re all set before you begin than to have to go through the videos multiple times.
Please watch the video and review all of the information on this page to ensure things go smoothly – thank you!
TUTORIAL VIDEO
PLEASE watch the video above even if this is not your first project with us – things constantly change.
REQUIRED FEATURES
Our staff has already created a PDF Handout and has added Banners and PopUps to your project. You are welcome to check these over and make changes as you see fit.
PDF Companion Handout
Users love to get a downloadable companion PDF that they can print out, follow along with, and make notes on. This does not have to be highly detailed – the detail is in the video. Even an exercise name and a place for notes is helpful. But this is a great place for extra explanation, graphics, and anything else that may help the user understand the information. But it is most efficient to work on this in conjunction to reviewing your videos so that the PDF matches your videos.
Here are some examples: Example 1 | Example 2 | Example 3
BANNERS
Please add a banner in the log for each exercise or section in your video log as you see fit. There is not a lot of room for long titles – 3 or 4 words max for the main and then there is some room for subtitles if needed as well. Explanation of Banners in the video above. Please! – use correct caps for Banners- Ribcage Circles – not Ribcage circles.
Banners have a character limit – we need short titles for these!
• Top Line – MAX 17 CHARACTERS / Bottom Line – MAX 21 CHARACTERS
• PLEASE use the character count column to see where you’re at
• PLEASE cap as titles – Prone Leg Lifts NOT Prone leg lifts
• These are copy and pasted as is – please check spelling”

Example of a banner.
POPUPS
POPUPS # “MAX 160 CHARACTERS.
PopUps have a character limit – please keep it brief and to the point! The shorter the better
• PLEASE use the character count column to see where you’re at
• PLEASE use sentences with punctuation.
• These are copy and pasted as is – please check spelling & grammar”
Our members love this extra layer of information – but too many can start to get distracting and become annoying. A good balance is to try to keep it to 1 every five minutes at most – and to make sure the information contained is important and valuable.
PopUps are explained in the video at the top of the page. Please – cap the first letter and check spelling!
Sample PopUps:
Please review the video at the top of this page and ask questions about anything!
OTHER FEATURES AS NEEDED
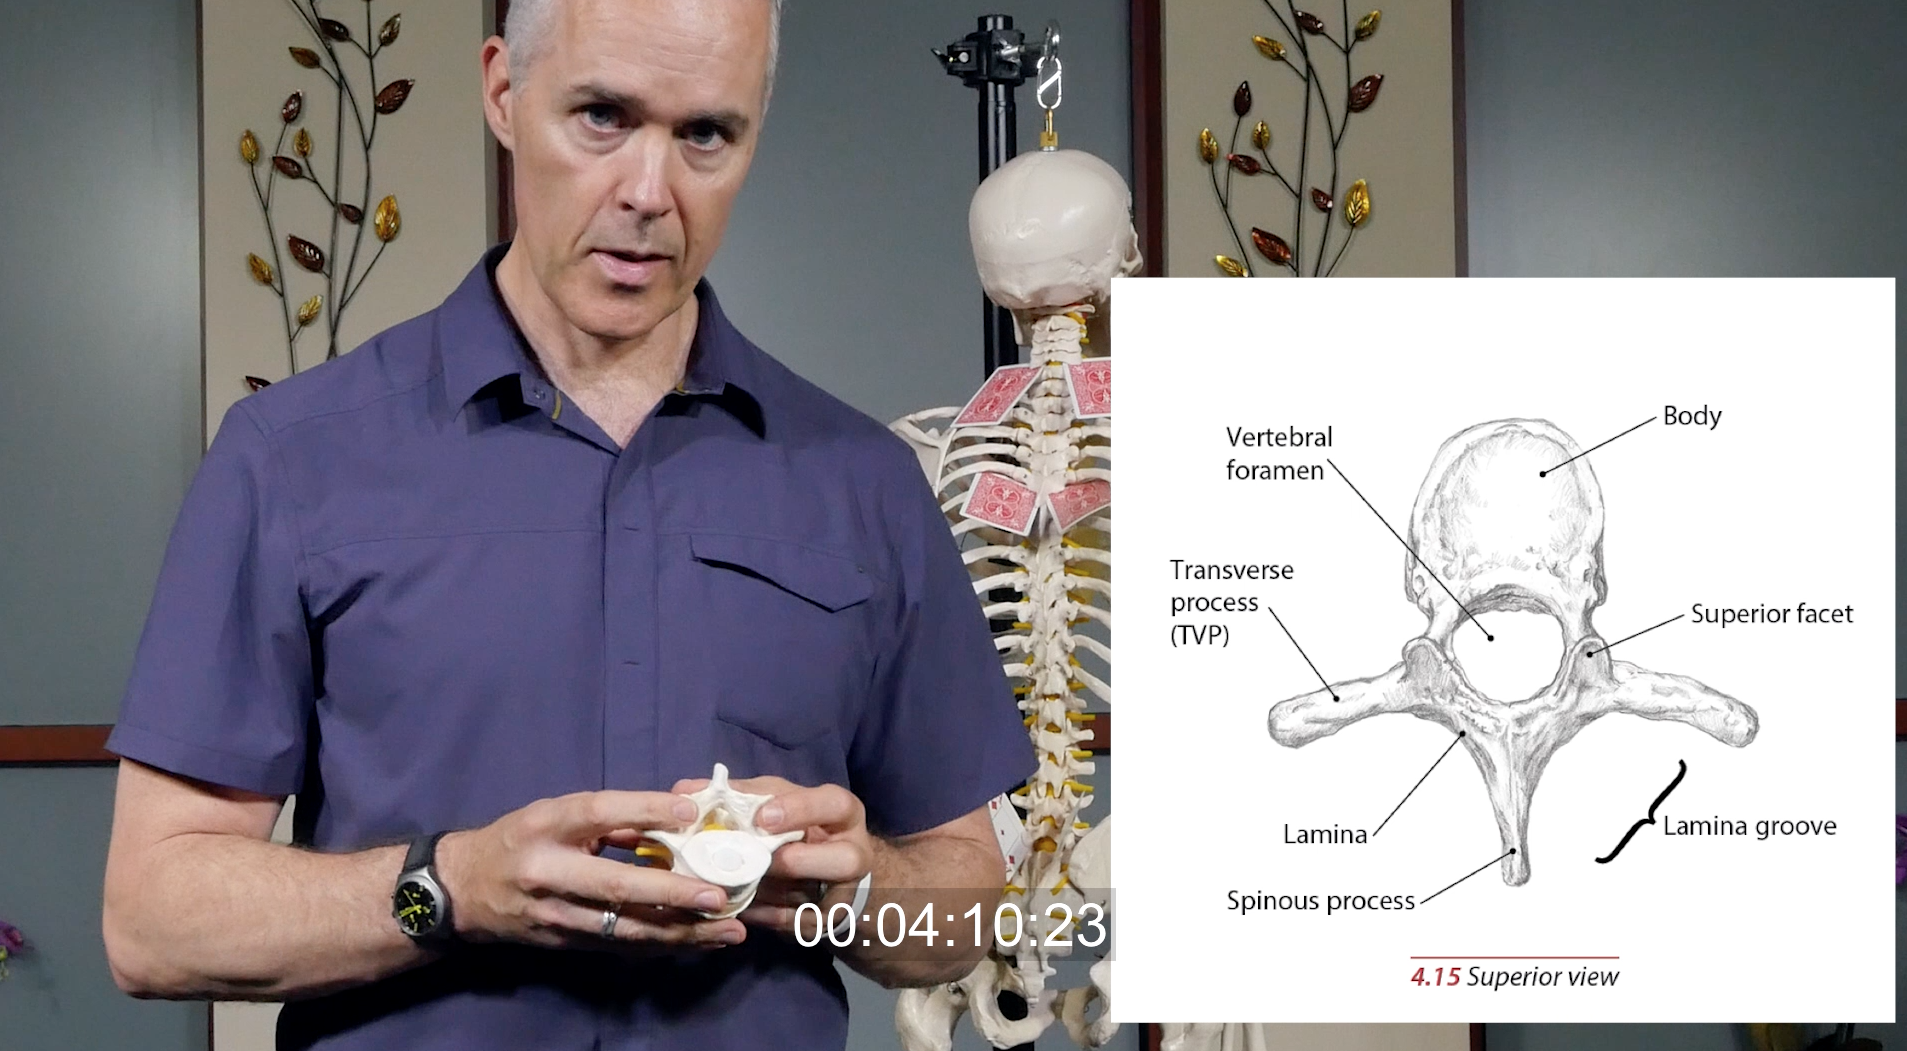
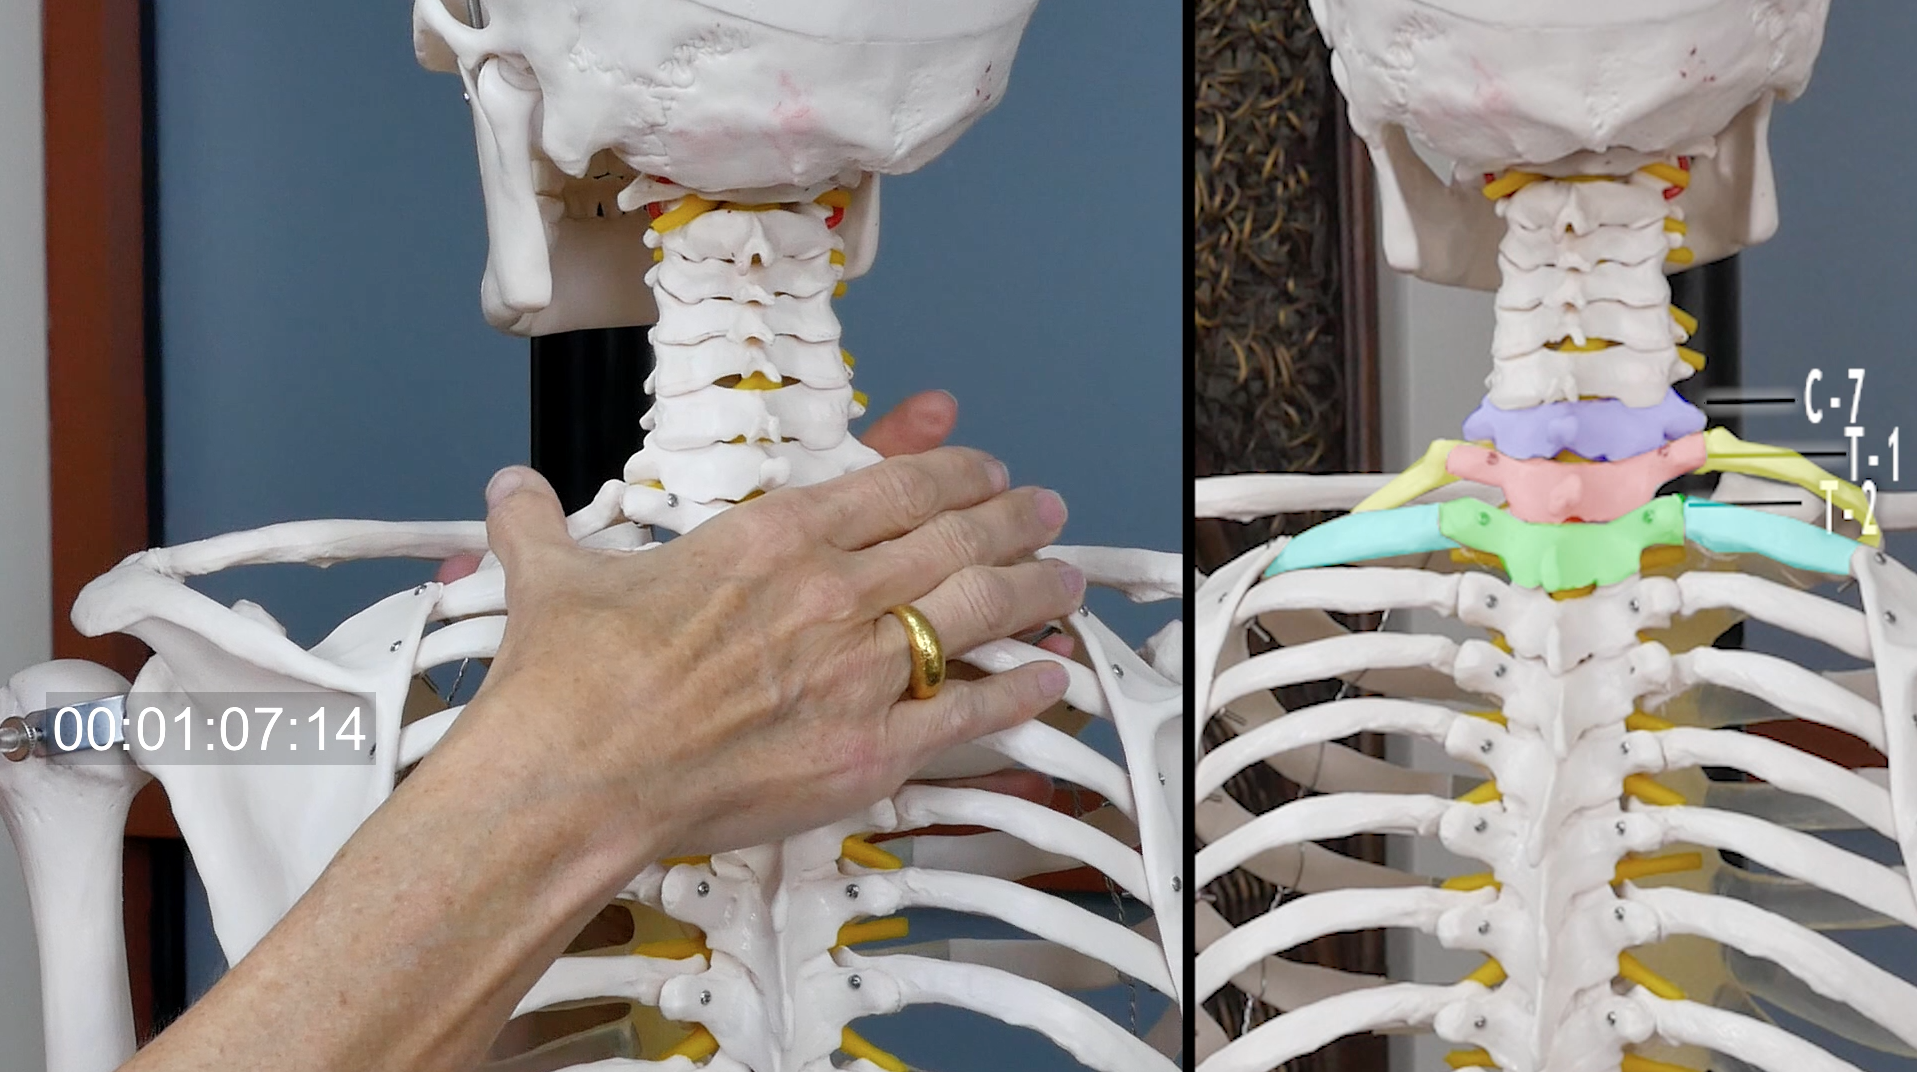
Anatomy Images
If you would like to add anatomy images to your project – please note this on your video log and mark them as IMAGE and designate if it can be full screen (preferred) or if it needs to be a window within the frame. Samples are in the video above.
Please note that there can be issues when adding images to your videos. It’s best to have them full screen when possible as sometimes it’s difficult to make them large enough to be a window within the video. If it’s important to see what you’re doing on the screen – then don’t add an image.
We have access to some resources which I’ll list below. There are some anatomy images for your use HERE – and we also have permission to use images from the Trailguide slideshows and image bank. We can make sections glow, add arrows, highlight – etc. Samples in video.
Sample Graphics:
Trail Guide to the Body
We have permission to use images from the Trailguide to the Body Powerpoint presentations. You can access these here:
Login using our information:
Login using our information:
email: studio@fusionpilatesasheville.com
password: VO%&qj9qA*Y!9laR
Once logged in:
- Go to: https://booksofdiscovery.com/for-instructors/
- Scroll down and chose Power Points / Trail Guide to the Body, 6th Edition PowerPoint
- From there you can access whichever chapters that are relevant…
You can download all of the PowerPoints on this page. If you would like to use any of these images- please put TGSlide and in the notes list the PowerPoint number (1 thru 7) and the slide number so we can find what you’d like to use.
WikiCommons
We are also free to use any images from Wikimedia Commons. Visit: https://commons.wikimedia.org/wiki/Category:Images and use the search bar.
If you wold like to use any of these images, please list it as Wiki in the log, and put the url to the image in the notes (like https://commons.wikimedia.org/wiki/Skeleton#/media/File:Primatenskelett-drawing.jpg)
OTHER GENERAL INFO
FRAMING & ANGLES
The camera angle and framing of a shot isn’t always set in stone and we have some options in Post. If you think something should be wider or closer in, or if you think we’ve chosen a camera angle that isn’t idea – just note it in the exact spot you’re referring to in the video.
Also note – I always focus in on the model when there are exercises happening. One thing that we can do in video that we can’t do as well live is let the viewer get up close and personal where they can see the details of what is happening clearly. So there will be times when you might be cut out of the frame a bit in order to zoom in closer to see the model. This will probably seem odd to you – but please understand that the viewer is going to be concentrating on what your are saying – but visually they will be concentrating on the model.

We usually have 3 camera angles to chose from
AUDIO/COLOR
• Sometimes audio and color are perfect right out of the camera, but often they need a bit of work in post. Please keep in mind that audio fixes and color correction/grading are done last. If you hear or see anything that needs attention though – please note in the exact spot you’re referring to in the video.
I’ve available at any time day or night if you need anything. 828.335.8887.
~ Angelo