<< Pre Shoot Wardrobe and Tips
Our goal is to make your shoot day as stress free and as enjoyable as possible. Don’t hesitate to let us know what you need. We’ll go over most of this in person before your shoot – the only thing it may be important to pay attention to now is wardrobe.
WORKSHOP LENGTH:
There have been several times when a presenter thought they had a 2.5 hour workshop – but then were finished after 1.5 hours. It’s important to have a finished workshop that is over 2 hours so that we can price your program at that level. If you think you’re workshop will not be 2 hours long please let us know!
YOUR INTRO:
We will use the first two minutes or so of your workshop as a video teaser on your workshop sales page. If possible – those first two minutes are a great time to introduce your self and to give a good overview of what your workshop is going to be about and what an instructor is going to take away with to get them curious and interested.
WARDROBE FOR MODELS & PRESENTERS:
- Avoid black or dark colors
- Avoid pure white
- Avoid tight patterns
- Avoid noisy jewelry
- Avoid lose clothing
- PLEASE don’t wear solid black or white. Black clothing will hide the details of movement and pure white causes exposure issues. Please wear light shades and solid colors for the best outcome.
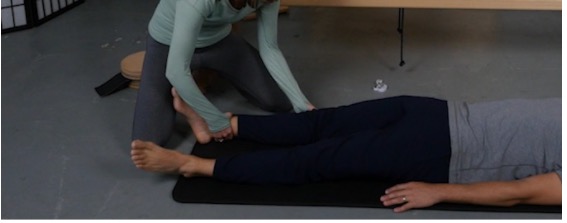
Here’s an example of what dark blue pants on a dark mat looks like. Detail is lost.
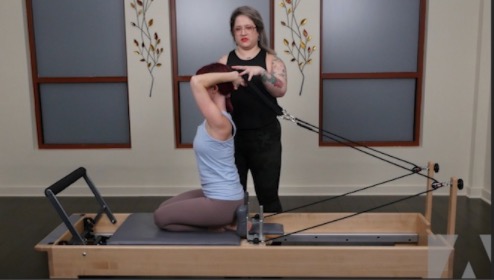
Here’s an example of black straps against a black top. They disappear completely.
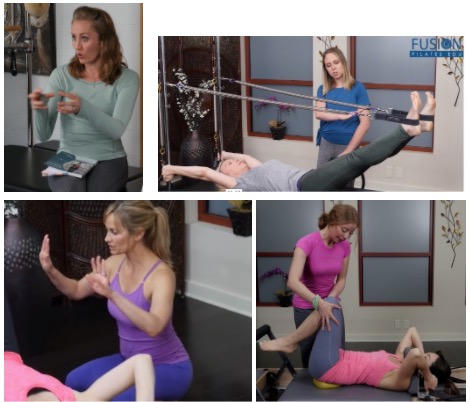
The best colors to wear are lighter solid colors. Here are some examples of great outfits for video:
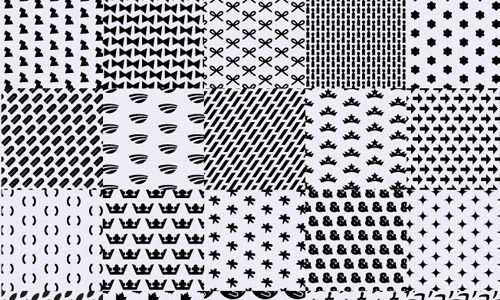
- Please don’t wear tight or busy patterns. These can cause strange distracting pulsating effects on video.
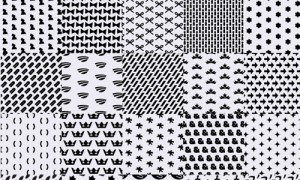
Tight patterns wreak havoc!
- Please don’t wear loose fitting clothing. This is especially important for models or if you’re doing movement. Loose clothing can be distracting and makes it difficult for the viewer to see the body clearly.
- Please avoid heavy jewelry that might make noise.
HAIR/MAKEUP:
We are lean and mean and there will not be a hair/makeup person on our shoot. Your natural look is great. Don’t stress over hair & makeup. Come as you are!
SHOOT PROCESS
We try to make the process as stress free as possible and we will adapt to whatever style of shooting that suits you. If you get on a roll and just want to power through, that’s what we’ll do. If you’d rather shoot shorter segments and take a small break between each, that’s fine too. We’ll find the process that works for you. Just keep in mind that we can take our time, you can redo whatever you’d like. The goal is to make something great and have fun doing it. If you feel stressed or uncomfortable during our shoot – then something has gone terribly wrong – so please let us know!
SHOOT POINTERS FOR PRESENTERS
FOCUS ON THE “A” CAMERA
 Act like the lens on the A Camera contains your favorite group of students. Present to it just as you would to a live class. I will be running around a bit between cameras – don’t let me distract you. Always address the A Camera and not the other cameras. It will be marked and easy to recognize.
Please make sure you can always see the A Camera – if you are behind the model or a piece of equipment, the viewer won’t be able to see you if you can’t see the A Cam.
BE AWARE OF WHAT THE CAMERAS CAN SEE
Try to keep from being between the cameras and whatever you’re trying to show or are pointing out on the model. It’s easy to be pointing out something – say – a shoulder blade moving – and have your hands block the view of the cameras. Just try to cheat it a bit to allow the camera to see whatever it is you are pointing out.
CUE FROM BEHIND
Try to always cue from behind the model and/or equipment to give the cameras the best view of what is going on.
BULLET POINTS FOR REFERENCE
Most presenters bring a large pad like THIS that has bullet points for their workshop. We position this directly below the main camera so that the presenter can reference it when needed to make sure they stay on track and don’t miss anything that’s been planned.
SHOW AND GO
Don’t worry too much about balancing the model or doing tons of reps (just mention that normally you’d do the other side.)
PROCESS
The most efficient way to shoot is to present as you would a live workshop with long takes. Of course we’ll need to break and reset for different pieces of equipment or new setups. And if something goes wrong – no stress – we can reset and re-do.
INTRO/OUTRO:
The intro is just a short introduction where you tell the user who you are and a bit of your background if you’d like. From there, a short general overview of what the workshop is going to be about. This intro will also be used as a Teaser Video on your workshop’s sales page – so if you are able to express what an instructor will gain by taking your workshop – that would be great!
The outro can be extremely short – basically, “Thank you for joining me, I hope you enjoyed this workshop. If you have any questions or comments – please visit the Forum.”
YOU CALL THE CUTS
Sometimes it’s difficult to tell if you’re finished or if you’re just taking a pause – so it seems to work best for us to keep rolling until your are finished and call the cut.
At the end of a section – just end and then stare at the camera for just a moment before you say “Cut”. This will feel strange – you’ll want to wrap it up somehow – like, “Okay – that’s it…” or “Thank you…” – but it edits best if you just state your last point and just stand there. It will feel awkward – but it will edit well.
MODEL DISCUSSIONS
Our models will not normally be wired for audio – so if a back and forth conversation is important for your workshop – please let us know so we can work that out beforehand.
If there is the occasional question to the model – it will usually be picked up through your microphone. Or you can also just repeat what they’ve said.
AUDIO ISSUES
You will be wearing a wireless lavaliere microphone on your chest. Please be careful not to touch the area where the mic is situated when demonstrating as it will distort the sound and create a loud pop. Also – holding props to your chest (balls etc) or laying on your stomach will cause audio problems. If any of this is necessary – please let us know in advance and we’ll make arrangements.
Loud noises such as claps can cause audio issues.
EQUIPMENT
It is best to shoot everything needed on each piece of equipment one at a time. Meaning – all segments with Cadillac, all with Reformer, etc… If this is not possible or if this will interrupt the flow of your concept – please let us know in advance.
Also please note – many users will take their iPads or laptops to their studio to do the exercises and follow along. This is another good reason to do one piece of equipment at a time. Viewers don’t always like having to change back and forth between different pieces of equipment as they go through your workshop.
CAMERA SETUP & ANGLES
Generally – we will have a three camera setup.
Camera A is the camera you will address and will get a wide shot from directly in front of you that includes everything that happens.
Camera B will be at a 45 degree angle from the side – getting a bit of a closer shot – mostly concentrating on the model when applicable.
Camera C will be focusing on close ups and details. I’m usually able to follow whatever seems to be most important.
If there is anything specific in a section that you know you’d like to see a closeup of – please let us know before we start shooting that section and we’ll take care of it.
SHOT ISSUES
Direct overhead shots are difficult to setup. If this is something you may need – please let us know in advance.
Exercises against walls are difficult to shoot. If this is something you may need – please let us know in advance.
SHOOT POINTERS FOR MODELS:
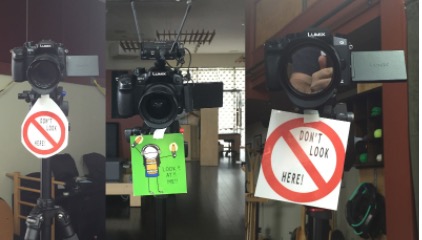
• Please avoid looking directly into any of the camera lenses. It’s best to just pick a point somewhere out in the room to concentrate on or to pay attention to the presenter.
• Please don’t offer comments unless the instructor asks you something. You’re probably going to want to react and say things like, “That felt great!” or you may want to talk tell the instructor about something releasing, etc after certain exercises. Please don’t! If the instructor does ask you something specific, like, “How did that feel?” – please keep your answers short and concise and try to speak a bit loudly so that the instructor’s microphone will pick it up.
• Please don’t try to move perfectly (unless the presenter asks you to). Honestly – what is most helpful for our viewers is when they get to see imbalances and problems that the instructor can show them how to solve.