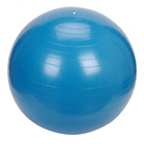
 The stability ball requires participants to find their balance. It demands that we find our center on an unstable surface. This will help develop strong hamstrings and glutes. These muscle groups are less developed because they are on our backside and we are forward-moving beings. We don’t like to walk backwards even though it is very beneficial. These next exercises on the stability ball will reinforce and create more strength in these areas.
Exercise: BRIDGING WITH THE STABILITY BALL
• Start on your back on the mat with the knees bent and the heels resting on top of the ball, arms by your side, and eyes to the ceiling.
• Inhale to prepare.
• Exhale and slowly roll through the spine (from the bottom to the top), one vertebra at a time until you are anchored at the top of your shoulders.
• Be sure you are not putting your weight on the neck and flattening the cervical spine.
• As you roll up slightly push the heels down into the ball to help stabilize.
• Inhale and hold at the top.
• Exhale and slowly roll down the spine, one vertebra at a time until you are back in the starting position.
• Rolling the spine up and down helps to stretch and lengthen the spine.
ALTERNATE VERSION
• Start on your back on the mat with the knees bent and the heels resting on top of the ball, arms by your side, and eyes to the ceiling.
• Inhale to prepare.
• Exhale and slowly hinge the spine up, in ONE piece. Think of your spine as a flat, wooden board from the shoulders to the hips.
• Anchor at the tops of the shoulders. Be sure you are not putting weight on the neck and flattening the cervical spine.
• As you hinge up slightly push the heels down into the ball to help stabilize.
• Inhale and hold at the top.
• Exhale and hinge slowly back down in one piece.
In hinging you want to think of keeping the spine in neutral position as you lift and lower it. Hinging the spine up and down helps strengthen the spine and core muscles.
ADDING ON
• Start on your back on the mat with the knees bent and the heels resting on top of the ball, arms by your side, and eyes to the ceiling.
• Inhale to prepare.
• Exhale and slowly roll or hinge the spine up.
• Anchor at the tops of the shoulders.
• Inhale and hold at the top.
• Exhale and while keeping the back up and weight at the tops of the shoulders, push the ball out and lengthen the legs.
• Inhale, keep the back lifted and in the same position, and bend the knees bringing the ball back in.
• Do 4 to 6 reps and then roll or hinge down to the starting position.
Exercise: TABLE TOP WITH THE STABILITY BALL
• Start seated on the stability ball at the end of your mat facing in toward your mat.
• Exhale and slowly walk the feet out until the head and shoulders are resting on the ball.
• The hips should be lifted so the shoulders and hips are in line.
• The ankles should be aligned right under the knees.
• The hands can rest on the front of the hips.
• Hold for two to three breath cycles.
• Feel the glutes and back of the legs working to hold this position.
• On an exhale, slowly walk the feet back in toward the ball and come back to your seated starting position.
ADDING ON
We can add a chest opening to this pose.
• Start seated on the stability ball at the end of your mat facing in toward the mat.
• Exhale and slowly walk the feet out until the head and shoulders are resting on the ball.
• The hips should be lifted so the shoulders and hips are in line.
• The ankles should be aligned right under the knees.
• Start with the arms reaching long by the sides of the body.
• During the arm movement, keep the hips in place and the eyes to the ceiling.
• Start with Toy Soldier Arms.
• Inhale and reach the left arm back as you reach the right arm forward.
• Exhale and slowly scissor the arms past each other.
• Inhale and hold.
• Exhale and slowly scissor the arms past each other.
• Do 4 to 6 reps on each side.
You can also add on Angel Arms.
• Inhale and reach both arms straight back.
• Exhale and slowly circle the arms around and back to the starting position.
• To change directions, inhale and circle the arms around to the back.
• Exhale and press the arms back down to your side.
• Do 4 to 6 reps of each direction.
Notice how much the glutes and hamstrings have to work to hold the tabletop position as you work through the different arm positions.
ADDING ON ADVANCED VARIATION
Be sure that you have been successfully practicing all of the above to prepare you for this sequence.
• Start by getting into the tabletop position in the same way.
• Keep the eyes to the ceiling and the hands resting on the front of the pelvis.
• Inhale and lift the left foot just a few inches off the ground.
• Hold for a second and then exhale to slowly lower it down.
• Switch feet.
• Do 4 to 6 on each side.
• Make sure that you are holding your center as you lift the feet.
• There should be no shifting of the spine or pelvis as you lift the feet.
• To advance this even more, you can try to straighten the leg.
• Inhale and hover the foot just a few inches from the ground.
• Exhale and try to straighten the leg, flexing the foot and pushing out through the middle of the heel.
• The ankle should be in line with the hip, and the spine and pelvis should remain still as the leg lengthens.
• Hold and inhale.
• Exhale and slowly bend the knee and place the foot on the floor.
• Do 2 to 4 on each side.
Mastering these stability exercises will greatly improve strength in the often ignored yet extremely important glute and hamstring muscles.
We hope you found these tips helpful! Leave us your comments below!

Leave A Reply (No comments So Far)
Please - comments only. All Pilates questions should be asked in the Forum. All support questions should be asked at Support.
You must be logged in to post a comment.
No comments yet.