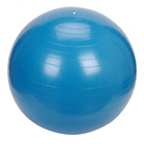
You can purchase a Stability Ball here.
A prop inserted into the classical Pilates mat work can really give you an extra challenge or sometimes a bit of an assist as we saw in our Magic Circle posts. This entry introduces another prop, the stability ball. Unlike the Magic Circle this is not a prop that was created by Joseph Pilates. The stability ball has been around for a long while and was first used in gym and athletic training. It challenges balance and works on proprioceptive strength.
When using tools such as the stability ball, muscles that don’t normally have to work are called upon and the participant starts to develop an integrated (whole body) strength. When you first start using the stability ball it will be challenging as your body learns to adjust.
Work slowly and consciously with the movements and the breath. Working too swiftly in an exercise not only plays into momentum (which makes it easier and less effective) but is also unsafe when using the ball. If you are 5 feet 5 inches or shorter, use a 55-cm ball. If you are above 5 feet 5 inches to 6 feet, use a 65-cm ball. Those over 6 feet should use a 75-cm ball. Because we all have different arm and leg lengths, you might find the ball assignments to be a bit off, so play with it and use the ball size that feels most comfortable and safe for your body.
In this segment we are focusing on the strength and stability of the upper body. The poses we will be attempting could potentially put strain on the wrist. The easiest solution to prevent or alleviate sensitive wrists is to use any of the gloves that have padding at the bottom of the palm (such as the WAGS gloves). These types of gloves will assure less bend in the wrist, but be warned that it will be even harder to find your balance while using the stability ball. You could also have your mat rolled up so that when you walk out into the pose you could rest the bottom of the palm (the heel of the hand) on top of the rolled up mat, which will also decrease the bend in the wrist.
Exercise: PLANK POSITION WITH THE STABILITY BALL
• Start with the ball at the edge of your mat.
• Drape your body over the ball facing in toward the mat.
• Take a few deep breaths, relaxing the body over the ball, stretching the lower back, and relaxing the head and neck completely.
• Start to walk out on the mat one hand at a time, cycling the breath.
• Stop when the shins are balanced on the ball, the legs are straight, the hips are in line with the shoulders, the shoulders are lined up over the wrists, and the chest and upper back are wide.
• Hold plank position for 1 or 2 breath cycles once you have arrived.
• Slowly start to walk back one hand at a time.
• Try to keep your center as you move backwards.
• Again drape yourself over the ball and take a few breath cycles to prepare for your next rep.
• In between reps you can also roll out the wrists.
• Do 4 to 6 reps.
Exercise: PLANK TO KNEES IN WITH THE STABILITY BALL
• Start with the ball at the edge of your mat.
• Drape your body over the ball facing in toward the mat.
• Take a few deep breaths while relaxing the body over the ball; stretch the lower back and relax the head and neck completely.
• Start to walk out on the mat one hand at a time, cycling the breath.
• Stop when the shins are balanced on the ball, the legs are straight, the hips are in line with the shoulders, the shoulders are lined up over the wrists, and the chest and upper back are wide.
• Hold the plank position for 1 breath cycle once you have arrived.
• Keep the arms straight and the upper back wide and exhale while bending the knees toward the chest and round the forehead in toward the knees.
• Inhale and unfold back into the plank position keeping your center.
• After 4 to 6 reps, slowly walk back one hand at a time and drape yourself over the ball.
Exercise: PLANK TO HIPS UP
• Start with the ball at the edge of your mat.
• Drape your body over the ball facing in toward the mat.
• Take a few deep breaths, relaxing the body over the ball, stretching the lower back, and relaxing the head and neck completely.
• Start to walk out on the mat one hand at a time, cycling the breath.
• Stop when the shins are balanced on the ball, the legs are straight, the hips are in line with the shoulders, the shoulders are lined up over the wrists, and the chest and upper back are wide.
• Hold the plank position for 1 breath cycle once you have arrived.
• Keep the arms and legs straight and the upper back wide.
• Exhale and fold in half by bringing the hips to the ceiling.
• At the top of the move, the stability is in the arms and back and light on the legs and feet. It is a hand stand position.
• Inhale and slowly come back to the plank position.
• After 2 to 4 reps, slowly start to walk back one hand at a time until you are relaxed over the ball.
We hope you found these exercises helpful! Tell us your thoughts below. If you’d like to purchase a Stability Ball, check out our Store here.


Leave A Reply (1 comment So Far)
Please - comments only. All Pilates questions should be asked in the Forum. All support questions should be asked at Support.
You must be logged in to post a comment.
I taught this in my Pilates for Athletes Mat class, and they loved it!